Alright, you wanna build a magic box? Cool! I love the idea. Let's break this down and make it happen. We're not talking about some fancy, high-tech illusion box here, but a simple, classic wooden box that's perfect for holding all your magical secrets.
Now, let's start with the materials. You'll need:
Wood: I recommend some nice, sturdy pine or cedar. You'll want a piece about 1/2 inch thick for the top, bottom, and sides, and another piece for the inner box if you want a secret compartment.
Wood glue: You'll need some good wood glue to hold everything together.
Screws: Get some small screws for attaching the sides to the top and bottom.
Sandpaper: You'll need sandpaper to smooth out the rough edges.
Finish: You can use stain, paint, or even just a clear coat of polyurethane.
Tools: You'll need a saw, a drill, a screwdriver, a tape measure, and a pencil.
Let's get started!
Step 1: Cut your wood
First things first, we need to cut our wood. Measure out the dimensions of your box. You want the top and bottom to be the same size, and the sides to be the same height. I'm going for a box that's 8" x 8" x 4" for this project.
You can use a saw to cut the wood to size. Don't worry if your cuts aren't perfectly straight, we'll sand them down later.
Step 2: Make the inner box (optional)
This is where you get to add a little mystery. For a hidden compartment, you'll need to make another box that fits inside your main box. The inner box doesn't have to be as big as the outer box. Just a smaller box that will fit inside the outer box, leaving some space around it.
Cut out the wood for the inner box using the same method as before, but make it a little smaller in all dimensions. You can use a jigsaw to cut out a decorative pattern on the top of the inner box if you want.
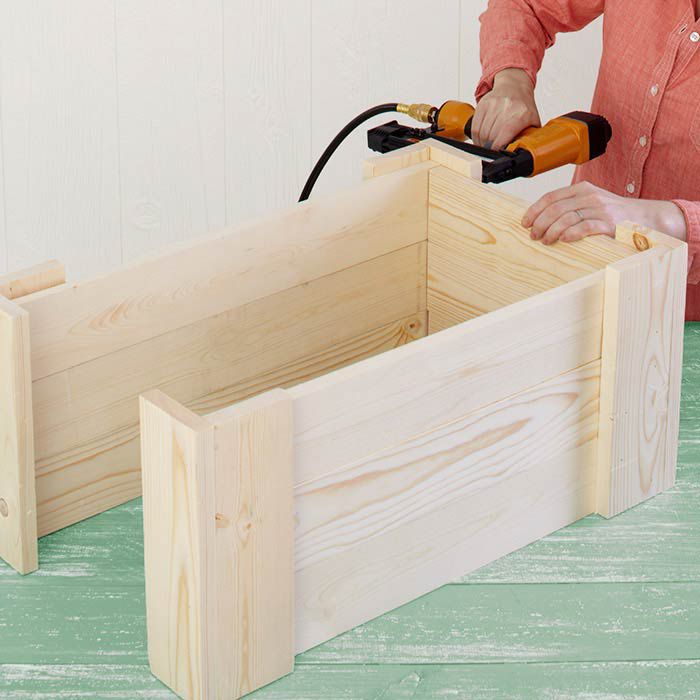
Step 3: Glue the sides to the top and bottom
Alright, time to start assembling! Grab your wood glue and start gluing the sides of the box to the top and bottom pieces.
Make sure to apply a thin layer of glue along the edges of the wood, and clamp the pieces together until the glue dries. I usually let it dry overnight.
Step 4: Sand and smooth
Once the glue is dry, you can use sandpaper to smooth out any rough edges or imperfections. Sand the entire box with sandpaper, starting with a coarse grit and gradually moving to a finer grit.
This will give your box a nice, smooth finish.
Step 5: Add your secret compartment (optional)
Now, if you're feeling ambitious, you can add a secret compartment to your magic box. This is a great way to add an extra layer of mystery and intrigue to your magic box.
To create a secret compartment, simply make a smaller box out of wood, as we discussed before. This inner box can be used to hide things like playing cards, small objects, or even a secret message! It will be hidden inside your main box.
Step 6: Attach the inner box (optional)
After you've made your inner box, you'll need to attach it to the inside of your main box. You can use glue, screws, or even a combination of both.
Make sure to center the inner box inside the main box. This will help ensure that the inner box stays in place.
Step 7: Finishing touches
Now that your magic box is assembled, it's time to give it a finishing touch. You can stain, paint, or just use a clear coat of polyurethane to protect the wood.
I usually choose to use a stain for a classic look. But feel free to get creative with your color choice, and use any finish you want.
Step 8: Decorate (optional)
To really give your magic box a personal touch, add some decorations! You can use a variety of methods to decorate your box, including:
Painting: You can use acrylic paints to create intricate designs or patterns on your box.
Decoupage: You can use decoupage to add images, newspaper clippings, or fabric to your box.
Woodburning: If you're feeling adventurous, you can use a woodburning tool to create intricate patterns and designs on your box.
Here are some ideas for your decorations:
Stars: You can paint stars on your box to give it a celestial feel.
Moons: Paint a moon on your box for a mystical look.
Runes: You can draw runes on your box for a magical and mysterious feel.
Celtic Knots: Draw or burn Celtic knots into your box. They are a beautiful and powerful symbol of eternity.
Magic symbols: Use symbols associated with magic and illusion, such as wands, stars, and crescent moons.
The final reveal
And there you have it! You've created your own magic box. It's ready for all your magical adventures. Maybe you can hide a secret message for a friend, or use it for a grand reveal in a magic show.
Remember, this is just a basic plan. You can customize it to your liking, and make it your own! Have fun and be creative!
Bonus tips:
Consider a hinge: You can add a hinge to your box to make it easier to open. It adds a little more functionality.
Magnetic closure: You can add a magnetic closure to your box to keep it secure.
Add a lock: For extra security, you can add a lock to your magic box.
Use a different wood: If you're feeling adventurous, you can use a different type of wood for your magic box.
Embellish! Don't be afraid to add your own personal touch to your magic box.
Remember, the best part of building a magic box is being able to personalize it. Have fun with it, and don't be afraid to experiment.
So, grab your tools, gather your materials, and let's get building!
0 comments:
Post a Comment